
How to Clean Leather: A Complete Step-by-Step Guide (2026)
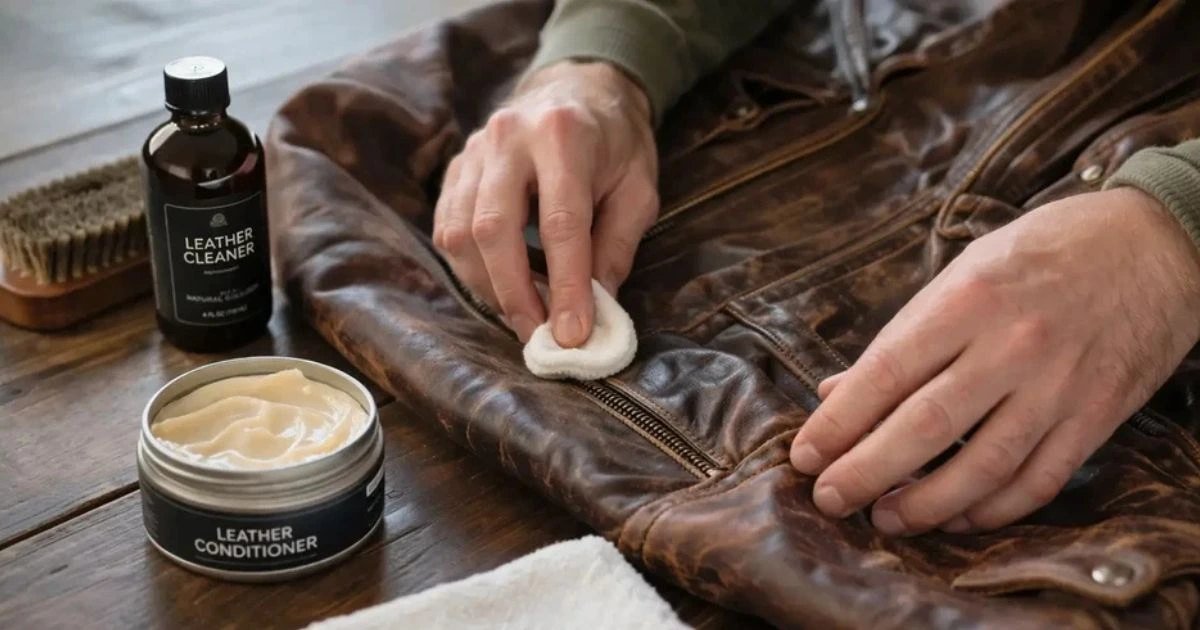
Learning how to clean leather the right way is the difference between a piece that ages beautifully and one that cracks. Maintaining high-quality hides requires a delicate touch. Because every item features a unique finish and condition, you must approach the task with patience. Proper care preserves the natural beauty of your favorite goods for years.
Many people mistakenly reach for harsh household chemicals. However, the best way to clean leather involves gentle tools and minimal moisture. You should always prioritize controlled wiping and natural drying to protect the material’s integrity.
This leather cleaning guide provides the essential steps to clean leather safely. We will walk you through identifying your specific material, testing products, and removing stubborn stains. By following our professional advice, you can master the art of cleaning leather without causing damage.
Key Takeaways
- Always test your chosen product on a hidden area first.
- Avoid soaking the material, as excess water causes permanent damage.
- Use soft, microfiber cloths to prevent surface scratches.
- Condition your items regularly to maintain flexibility and prevent cracking.
- Establish a consistent maintenance routine to extend the lifespan of your goods.
Table of Contents
Identify the Leather Type and Check Its Care Instructions
The first rule of how to clean leather is knowing exactly what you are working with. Identifying your leather type is the most critical step in maintaining its beauty and longevity. Because different leather types vary significantly in their surface protection, absorbency, and durability, you cannot apply a universal cleaning method to every item. Understanding these differences ensures you choose the right approach for your specific piece.
Recognize Finished, Full-Grain, Top-Grain, and Genuine Leather
Finished leather is the most common type found in furniture and car interiors because it features a protective coating. This makes finished leather cleaning relatively straightforward, as the surface resists moisture and stains. In contrast, full-grain and top-grain leathers are high-quality materials that retain natural textures and require more delicate handling.
Genuine leather is a term often used for lower-grade layers that have been processed and corrected. While it is durable, it lacks the natural breathability of top-grain varieties. Always determine the grade of your item to avoid using harsh chemicals that might strip away its finish or cause premature cracking.
Distinguish Aniline, Suede, Nubuck, and Bonded Leather
Some materials are highly porous and require specialized attention. For instance, aniline leather care demands extreme caution because the material is dyed without a protective topcoat, making it highly absorbent. If you apply water or standard cleaners to aniline, you risk creating permanent water spots or darkening the hide.
Suede and nubuck are prized for their soft, velvety texture, but they are notoriously difficult to maintain. Proper suede leather care involves using dry methods, as liquid cleaners can ruin the nap of the material. Bonded leather, which consists of shredded leather scraps glued to a backing, is even more fragile and can peel if treated with aggressive solvents.
Read the Manufacturer’s Cleaning Label
Before you attempt any maintenance, always locate the manufacturer’s care tag. This label provides the most accurate instructions on how to clean genuine leather items safely. If the tag suggests a specific brand of cleaner or warns against water, follow those directions strictly to protect your warranty and the material’s integrity.
When to Stop and Contact a Leather Professional
Sometimes, the best course of action is to step back and seek expert help. You should contact a professional if you notice severe discoloration, deep structural damage, or if the item is made of an unknown, delicate material. Attempting to fix these issues yourself often leads to irreversible harm, so prioritize professional intervention for high-value or antique pieces.
Gather the Right Supplies Before You Clean Leather
When you learn how to clean leather, the tools you choose matter as much as the technique. Selecting high-quality cleaning leather supplies ensures your items remain in pristine condition for years. Proper preparation prevents accidental damage and helps you achieve professional results at home. By organizing your workspace before you start, you protect the integrity of your investment.
Essential Tools for Routine Leather Cleaning
To maintain your items, you need a specific set of leather cleaning tools. Start with a soft-bristled brush to gently remove dust from crevices without scratching the surface. A vacuum cleaner equipped with a soft brush attachment is also ideal for lifting debris from furniture seams.
Always keep several clean, soft microfiber cloths on hand. These cloths are essential for applying products and buffing the surface to a soft sheen. Avoid using rough rags or paper towels, as these can leave behind lint or cause micro-abrasions on delicate finishes.
Safe Cleaning Solutions and Conditioners
Using safe leather cleaning products is vital for long-term material health. Purpose-made leather cleaner formulas are pH-balanced to lift dirt without stripping the natural oils that keep the material supple. These products are specifically engineered to respect the moisture sensitivity of various leather types.
After cleaning, applying a high-quality leather conditioner is the best way to prevent cracking and fading. Conditioners replenish the moisture lost during the cleaning process, keeping the fibers flexible and strong. Always choose a product compatible with your specific leather finish to ensure the best results.
Products and Household Ingredients to Avoid
Half of how to clean leather is knowing what should never touch it. Many common household items can cause irreversible harm to your leather goods. It is important to steer clear of harsh chemicals that disrupt the natural balance of the material. Using the wrong substances often leads to permanent discoloration or structural weakness.
Why Bleach, Alcohol, Vinegar, and Excess Water Can Cause Damage
Bleach and alcohol are extremely drying agents that strip away protective topcoats and natural oils. Vinegar is acidic and can permanently alter the color or texture of the leather finish. Furthermore, using excess water can lead to water spots, mold growth, or warping as the material dries unevenly.
| Product Type | Effect on Leather | Recommendation |
|---|---|---|
| Leather-Specific Cleaner | Safe, pH-balanced, effective | Use Regularly |
| Bleach or Alcohol | Dries out, cracks, discolors | Avoid Completely |
| Vinegar Solutions | Acidic, damages finish | Avoid Completely |
| Excess Water | Causes warping and stains | Use Sparingly |
Prepare the Leather Before You Start Cleaning
Preparation is the step most guides on how to clean leather skip, and it is where most damage begins. Taking a few moments to prep your leather items will prevent accidental damage during your cleaning routine. When you prepare leather for cleaning, you create a safe environment that allows your chosen products to work effectively without interference from grit or debris.
Remove Loose Dust and Surface Debris
Before applying any liquid, you must remove dust from leather surfaces thoroughly. Use a soft-bristled brush or a dry microfiber cloth to gently sweep away loose particles. If you skip this step, you risk rubbing abrasive dirt into the pores of the material, which can cause permanent scratches.
Empty Pockets and Detach Removable Accessories
Check all pockets for coins, pens, or small items that might leak or cause structural stress. If your item has removable straps, buckles, or decorative charms, take them off to ensure you can reach every corner. This simple action prevents metal hardware from scratching the surface while you work.
Protect Nearby Fabric, Wood, and Other Materials
If you are cleaning a leather sofa or car seat, protect the surrounding areas from accidental spills. Use painter’s tape or plastic sheeting to cover delicate wood trim or light-colored fabric upholstery. This precaution ensures that your cleaning agents only touch the intended leather surface.
Test Every Product on a Hidden Area
Testing first is the safest habit you can build when learning how to clean leather. You should always perform a leather spot test before applying any solution to the entire item. Choose an inconspicuous spot, such as the underside of a cushion or an inner seam, to test leather cleaner. This practice is the best way to ensure the product is compatible with your specific finish.
How to Check for Color Transfer, Darkening, or Texture Changes
After applying a small amount of the cleaner to your test area, wait for it to dry completely. Inspect the spot carefully to prevent color transfer or unexpected finish damage. If you notice any darkening, stickiness, or stiffness, stop immediately and choose a different product.
| Preparation Step | Action Required | Why It Matters |
|---|---|---|
| Dust Removal | Use soft brush | Prevents scratching |
| Clear Pockets | Remove all items | Avoids leaks/dents |
| Surface Test | Apply to hidden area | Checks for damage |
| Area Protection | Cover nearby trim | Prevents staining |
How to Clean Leather Step by Step
You can easily revitalize your favorite leather goods by following a simple, how to clean leather step by step guide. The secret to success lies in maintaining a controlled process that keeps moisture on your cloth rather than flooding the material. Proper cleaning leather techniques ensure that you protect the finish while removing dirt effectively.
Step One: Apply a Small Amount of Cleaner to a Cloth
Never spray or pour cleaning solutions directly onto your leather items. Instead, apply a small, dime-sized amount of your chosen cleaner onto a soft, clean microfiber cloth. This method prevents uneven saturation and helps you maintain better control over the application.
Step Two: Wipe the Surface in Gentle Circular Motions
The best way to clean leather involves using light, circular motions to lift surface debris. Avoid scrubbing harshly, as this can damage the protective topcoat or cause unwanted friction. Gentle pressure is usually enough to achieve a deep, thorough clean.
Step Three: Work in Small Sections
Whether you need to clean leather furniture or a small handbag, always work in manageable sections. By focusing on one area at a time, you ensure that the cleaner does not dry on the surface before you have a chance to wipe it away. This systematic approach guarantees a uniform appearance across the entire piece.
Step Four: Remove Cleaner Residue Without Saturating the Leather
Once you finish a section, use a separate, clean cloth lightly dampened with distilled water to remove any remaining residue. This leather cleaning method is vital because leftover soap can attract dust or cause the material to feel sticky. Always ensure your cloth is only slightly damp to avoid soaking the leather fibers.
Step Five: Let the Leather Air-Dry Naturally
Allow your leather to air-dry in a well-ventilated area away from direct sunlight. Never use heat sources like hair dryers, radiators, or space heaters to speed up the process. Excessive heat can cause the leather to lose its natural oils, leading to stiffness, cracking, or permanent shrinkage.
How to Handle Seams, Creases, Handles, and Decorative Details
Pay extra attention to intricate areas where moisture might collect, such as seams, creases, and decorative stitching. Use a soft-bristled brush or a cotton swab to gently lift dirt from these tight spaces without pushing liquid into the crevices. Always dry these areas thoroughly with a clean cloth to prevent water damage or mold growth.
How to Clean Stains on Leather
Knowing how to clean stains on leather properly is the best way to preserve your investment. When an accident occurs, your immediate reaction often determines the long-term health of the material. By following specific techniques, you can address common issues without causing further harm to the delicate surface.
Blot Fresh Liquid Spills Before They Set
When you experience a spill, speed is your greatest ally. Use a clean, absorbent white cloth to gently blot the area. Never rub the liquid, as this forces the moisture deeper into the pores of the leather.
Remove Dirt, Mud, and Grease Without Spreading the Stain
For dry dirt or mud, use a soft-bristled brush to gently sweep away debris. If you are dealing with leather grease stains, sprinkle a small amount of cornstarch or talcum powder on the spot. Let it sit for several hours to absorb the oil before brushing it away carefully.
Treat Ink, Dye Transfer, and Makeup Carefully
Leather ink stain removal requires extreme caution to avoid stripping the finish. You might try a specialized leather cleaner or a tiny amount of rubbing alcohol on a cotton swab, but always test a hidden area first. If the ink does not lift immediately, do not force it, as you risk damaging the pigment.
Handle Food, Coffee, and Wine Stains
These substances can be acidic and may leave a lasting mark if left untreated. Use a damp cloth with a mild, pH-balanced leather soap to gently lift the residue. Leather spill cleanup is most effective when you work from the outside of the stain toward the center to prevent spreading.
Know Which Stains Require Professional Treatment
Some deep-set stains or delicate aniline leathers simply require expert care. If you notice the color changing or the stain remains stubborn after a gentle attempt, contact a professional cleaner. They have the tools to remove stains from leather without compromising the integrity of the hide.
“The secret to leather care is patience; rushing the process often leads to irreversible damage.”
Why Scrubbing and Harsh Spot Removers Often Make Stains Worse
Aggressive scrubbing is a common mistake that often turns a small mark into a permanent blemish. Harsh chemicals can strip away the protective topcoat, leaving the leather vulnerable and dry. Always prioritize gentle methods to ensure your items remain soft and supple for years to come.
How to Disinfect Leather Without Drying It Out
Disinfecting leather surfaces is a task that demands precision to avoid stripping away essential natural oils. Learning how to disinfect leather correctly ensures that you maintain a hygienic environment without compromising the integrity or texture of your valuable items.
Decide Whether Disinfection Is Necessary
Before you begin, evaluate the level of contamination on your leather. Not every surface requires heavy-duty sanitization, and over-treating the material can lead to premature cracking or discoloration.
- Assess if the item has been exposed to high-risk contaminants.
- Check the manufacturer’s care instructions for specific warnings.
- Consider if a standard cleaning is sufficient for your needs.
Use a Leather-Safe Disinfecting Product
To disinfect leather safely, you must choose your supplies with care. Avoid household bleach, ammonia, or high-alcohol sprays, as these agents will rapidly dehydrate the hide.
Always look for a leather-safe disinfectant specifically formulated for finished leathers. These products are designed to neutralize bacteria while maintaining the pH balance of the material.
Apply Minimal Moisture to High-Touch Areas
When you clean high-touch leather, such as armrests or handles, use a “less is more” approach. Saturating the leather can cause water spots or deep-seated damage to the fibers.
Lightly mist your cloth rather than spraying the leather directly. Gently wipe the surface to remove germs, ensuring the liquid does not pool in seams or crevices.
Allow the Surface to Dry Fully After Disinfecting
Patience is vital during the drying phase. Never use heat sources like hair dryers to speed up the process, as this will cause the leather to become brittle.
Allow the item to air-dry in a well-ventilated area away from direct sunlight. Once the surface is completely dry, you should apply a high-quality leather conditioner to restore the moisture lost during the disinfection process.
Special Precautions for Leather Used in Cars, Offices, and Public Spaces
Items like office chairs or those used to disinfect leather car seats require more frequent attention due to constant use. However, repeated exposure to sanitizing agents can strip away protective topcoats over time.
Consistency is key, but you must balance this with regular maintenance. Follow these guidelines for high-traffic leather:
- Condition regularly: Always re-hydrate the leather after a deep disinfection cycle.
- Monitor the finish: Watch for signs of fading or stiffness.
- Use protective barriers: Consider using seat covers or armrest protectors in public spaces to reduce the need for harsh cleaning.
Clean Different Leather Items and Finishes Safely
You should approach cleaning your leather belongings with care, as each piece faces different environmental stressors. Because items like belts and sofas experience varying levels of friction and exposure to body oils, a universal cleaning approach rarely works. Learning how to clean genuine leather correctly ensures that your investment remains supple and attractive for years.
How to Clean Genuine Leather Furniture
When you clean leather furniture, your primary goal is to remove dust without stripping the natural oils. Use a soft, dry microfiber cloth to wipe down the surfaces weekly. Avoid harsh chemicals that can cause the material to crack or lose its natural luster over time.
How to Clean Leather Couches and Chairs
To clean leather couch surfaces effectively, focus on high-contact areas like armrests and headrests where body oils accumulate. These spots often require a gentle, pH-balanced cleaner to break down grime without damaging the finish. Always work in small sections to ensure you do not leave behind excess moisture.
How to Clean Leather Bags, Purses, and Wallets
When you clean leather bags, pay close attention to the hardware and stitching. Use a soft-bristled brush to remove debris from the seams before wiping the exterior with a damp cloth. Always ensure the item is completely empty before you begin the cleaning process to avoid trapped moisture inside the lining.
How to Clean Leather Shoes, Boots, and Belts
To clean leather shoes and belts, you must address external elements like salt, mud, and water. Wipe away surface dirt immediately after use to prevent it from grinding into the grain. If your footwear gets wet, allow it to air-dry naturally away from direct heat sources to prevent stiffening.
How to Clean Leather Car Seats and Steering Wheels
When you clean leather car seats, you are battling UV exposure and extreme temperature fluctuations. Use a specialized automotive leather cleaner that contains UV protection to prevent fading and cracking. Steering wheels require frequent, light cleaning to remove the buildup of sweat and hand oils that can degrade the finish.
Why Suede and Nubuck Need Different Cleaning Methods
Suede and nubuck are porous, textured materials that react poorly to standard liquid cleaners. These surfaces can be permanently stained or matted if you use products designed for smooth, finished leather. Instead, use a specialized suede brush to lift dirt and a dedicated eraser block for spot cleaning.
“The secret to long-lasting leather is consistency rather than intensity. Gentle, regular maintenance prevents the need for harsh, deep-cleaning chemicals that often do more harm than good.”
| Item Type | Primary Stressor | Cleaning Frequency | Key Tool |
|---|---|---|---|
| Furniture | Dust & Sunlight | Monthly | Microfiber Cloth |
| Bags/Wallets | Handling/Friction | Bi-weekly | Soft Brush |
| Footwear | Salt & Moisture | After each use | Horsehair Brush |
| Car Interiors | UV & Heat | Monthly | UV-Protectant Cleaner |
Condition, Dry, and Protect Leather After Cleaning
Proper post-cleaning care is the secret to keeping your leather items looking brand new for years. While the best way to clean leather involves removing dirt, the follow-up steps are what truly preserve the material’s integrity. By taking the time to finish the process correctly, you shield your items from dryness, friction, and environmental damage.
Dry Leather Away From Heat and Direct Sunlight
After you finish cleaning leather, you must allow it to air-dry naturally. Never place your items near radiators, heaters, or in direct sunlight, as these heat sources can cause the material to crack or shrink. Patience is key; let the leather rest in a cool, well-ventilated area until it is completely dry to the touch.
Apply a Compatible Leather Conditioner
Once the surface is fully dry, it is time to condition leather after cleaning. Use a high-quality, compatible conditioner to restore the natural oils that were stripped away during the cleaning process. Apply a small, pea-sized amount to a soft cloth and work it into the leather using gentle, circular motions.
Buff Away Excess Conditioner
Applying too much product can leave a greasy film that attracts dust and grime. After letting the conditioner soak in for a few minutes, use a clean, dry microfiber cloth to buff the surface. This step ensures the leather has a natural, healthy sheen without feeling sticky or tacky.
Use a Protector for Water, Stains, and UV Exposure
To further protect leather from future spills and fading, consider applying a specialized leather protector spray. These products create an invisible barrier that repels water and guards against ultraviolet light damage. Always test the protector on a hidden spot first to ensure it does not alter the color or texture of your item.
How Often to Condition Different Leather Items
The ideal leather conditioner frequency depends on how often you use the item and the environment it lives in. High-touch items require more frequent attention to maintain their suppleness and prevent wear.
- Leather Car Seats: Every 3 to 6 months, as they face intense UV exposure.
- Leather Furniture: Every 6 to 12 months, depending on household traffic.
- Leather Shoes and Boots: Every 1 to 3 months, especially if worn in harsh weather.
- Leather Bags and Wallets: Every 6 months, or whenever the material feels dry to the touch.
Avoid Common Cleaning Mistakes and Build a Maintenance Routine
Avoiding common leather cleaning mistakes is the secret to a long-lasting finish. Many owners inadvertently damage their items by using harsh methods that strip away natural oils. By understanding what to avoid, you ensure your investment remains supple and attractive for years.
Do Not Soak, Over-Scrub, or Use Excessive Pressure
Leather is a porous material that absorbs moisture quickly. Never soak the surface, as this can lead to warping or water spots that are difficult to remove. When you learn how to clean stains on leather, always use a light touch rather than scrubbing aggressively, which can damage the grain.
Keep Leather Away From Hair Dryers and Radiators
High heat is the enemy of natural hides. Never use a hair dryer or place your items near a radiator to speed up the drying process. Rapid moisture loss causes the material to become brittle and crack prematurely.
Do Not Mix Cleaning Products
Chemical reactions between different cleaners can cause permanent discoloration or sticky residue. Stick to one brand or a single, pH-balanced solution. If you are unsure about how to disinfect leather, always choose a product specifically labeled as safe for your leather type to avoid unwanted chemical interactions.
Store Leather in a Cool, Dry, Ventilated Space
Proper storage prevents mold and mildew growth. Keep your items in a cool, dry area with good airflow. Avoid plastic bags, which trap moisture and prevent the material from breathing naturally.
Set a Practical Dusting and Deep-Cleaning Schedule
A consistent leather maintenance routine is the best way to prevent long-term wear. Regular dusting removes abrasive particles that can scratch the finish over time. Schedule deep cleanings based on how often you use the item and the environment in which it is kept.
Signs That Leather Needs Cleaning, Conditioning, or Repair
Watch for specific indicators that your item requires attention. If you notice dryness, stiffness, or visible cracking, it is time for a deep conditioning treatment. Other signs leather needs repair include persistent odors, peeling finishes, or loose stitching that may compromise the integrity of the piece.
| Condition | Action Required | Frequency |
|---|---|---|
| Light Dusting | Wipe with dry cloth | Weekly |
| Visible Soil | Gentle surface clean | Monthly |
| Dryness/Stiffness | Apply conditioner | Quarterly |
| Deep Cracks | Professional repair | As needed |
Conclusion
Mastering the art of cleaning leather transforms how you care for your favorite goods. You now possess the knowledge to identify specific material needs and apply the right techniques for lasting beauty.
Your commitment to safe leather maintenance ensures that your furniture, bags, and apparel remain supple for years. Always prioritize testing products in hidden spots before full application. This simple habit prevents irreversible damage to delicate finishes.
Consistent care remains the secret to longevity. By following this leather care guide, you protect your items from the harsh effects of heat, moisture, and neglect. A proactive schedule keeps your collection looking pristine and professional.
Take a moment to inspect your leather items today. Establishing a routine now saves you from costly repairs later. Your dedication to proper upkeep rewards you with durable, high-quality pieces that stand the test of time.
FAQ
What is the best way to clean leather without causing damage to the finish?
The best way to clean leather involves a “less is more” approach using professional-grade supplies like Bickmore Bick 1 Leather Cleaner and a soft microfiber cloth. You should always apply the cleaner directly to the cloth rather than the leather itself to prevent saturation. Use gentle circular motions to lift surface grime and always allow the item to air-dry naturally away from artificial heat sources like radiators or hair dryers, which can cause the material to become brittle and crack.
Can you explain how to clean genuine leather furniture and accessories?
When learning how to clean genuine leather items such as a Pottery Barn sofa or a Fossil wallet, the first step is to remove loose debris using a vacuum with a soft brush attachment. Once the surface is clear, wipe it down with a pH-balanced cleaner specifically formulated for finished leather. It is crucial to work in small sections and avoid getting the seams or stitching overly wet, as trapped moisture can lead to mildew or structural weakness over time.
What should you do for unexpected spills and how to clean stains on leather?
To master how to clean stains on leather, speed is your best ally. You must blot fresh liquid spills immediately with a clean, dry cloth to lift the moisture before it penetrates the pores. For tougher marks like ink or grease, avoid the urge to scrub aggressively, as this often spreads the pigment and damages the grain. Instead, use a specialized spot remover like Lexol and always perform a hidden-area test to ensure the product does not cause discoloration or texture changes.
Is it possible to sanitize surfaces, and how to disinfect leather safely?
Knowing how to disinfect leather is essential for high-touch items like Tesla steering wheels or office chairs, but you must avoid harsh household chemicals like bleach or isopropyl alcohol. These substances strip away the natural oils and protective topcoats. Instead, use a product specifically labeled as a leather-safe disinfectant or a mild soap solution recommended by the manufacturer. Always follow the disinfection process with a high-quality conditioner to replenish the moisture lost during the cleaning process.
Why is it important to avoid using vinegar or dish soap on your leather goods?
While many DIY guides suggest vinegar or dish soap, these are often too acidic or alkaline for the delicate pH balance of leather. Over time, these household ingredients can break down the protective finishes on your leather, leading to premature peeling, fading, and dryness. Investing in a dedicated leather care kit from brands like Chemical Guys or Leather Honey ensures you are using formulas designed to preserve the material’s longevity and luster.
How often should you condition your leather items after cleaning them?
You should generally apply a leather conditioner every three to six months, though high-use items like Timberland boots or a daily-carry leather bag may require more frequent attention. Conditioning acts as a moisturizer for the hide; if the material begins to feel stiff, looks dull, or shows faint cracks, it is time for a treatment. Applying a light coat of Bick 4 Leather Conditioner will keep the fibers supple and provide a barrier against future stains and UV damage.
Do suede and nubuck require a different cleaning process than smooth leather?
Yes, suede and nubuck have a brushed “nap” that is extremely sensitive to liquids. Unlike smooth genuine leather, you should never use wet cleaning methods on these materials. Instead, use a specialized suede brush to lift the pile and a suede eraser to remove dry spots or scuffs. If you encounter a heavy stain on these delicate finishes, it is often best to consult a leather professional to avoid permanent water spotting or matting of the fibers.