
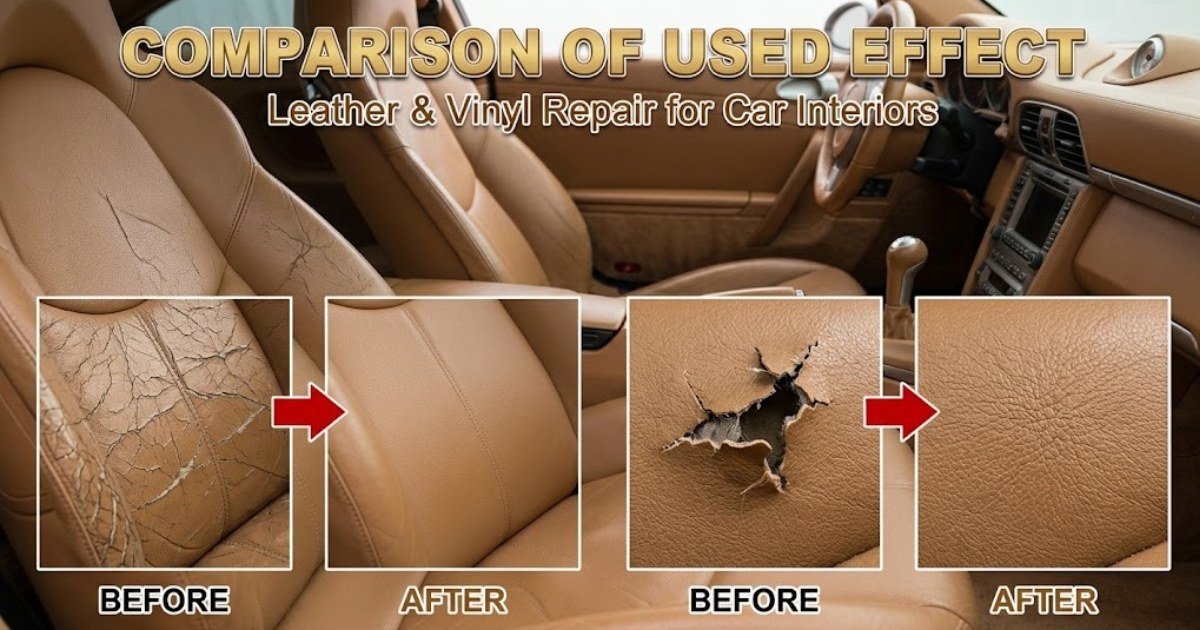
Car Leather Repair Kit: 7 Easy Steps to Fix Cracks & Tears
Do you see unsightly blemishes on your vehicle seats? Minor cracks, deep tears, or scratches can be fixed easily. A professional-grade car leather repair kit can help you do it without breaking the bank.
This guide will show you how to fix your upholstery. You will learn to assess damage, pick the right supplies, and prepare the surface. We will also cover how to apply fillers and protect your work for lasting results.
Please note that some damage might need a pro. But most common wear and tear can be fixed by you with these steps.
In This Guide
- Key Takeaways
- Assess the Leather Damage Before You Start
- Choose the Right Car Leather Repair Kit and Supplies
- Prepare Your Car Seats for a Durable Repair
- Fix Light Scratches, Scuffs, and Abrasions With a Car Leather Repair Kit
- Repair Cracked, Dry, or Peeling Leather on Your Seats
- Repair Tears, Cuts, and Small Holes in Leather Upholstery
- Recolor, Seal, and Finish the Repaired Area
- Maintain the Repair and Troubleshoot Common Problems
- Conclusion
- FAQ
Key Takeaways
- Assess the severity of your upholstery damage before starting any project.
- Choose a high-quality car leather repair kit suited for your specific material type.
- Proper surface preparation is the most critical step for a professional-looking result.
- Apply fillers in thin, even layers to ensure a smooth and natural texture.
- Always apply a protective sealant to prevent future fading and cracking.
- Know when to call a professional for deep structural or large-scale upholstery issues.
Assess the Leather Damage Before You Start
Before you grab a leather seat repair kit, you need to know what is wrong with your seats. Taking a close look helps you pick the right products and methods for your car.
Identify Whether Your Seats Are Genuine Leather, Vinyl, or Coated Leather
Different materials need different treatments. Genuine leather soaks up dyes, while vinyl or synthetic materials need special adhesives.
Using the wrong product on vinyl can cause it to warp or fail to dry. Always check your car manual or look for a tag under the seat to identify the material before starting.
Separate Surface Scratches, Cracks, Tears, and Peeling
Knowing the type of damage helps you figure out how much work you need to do. Light scratches might just need a quick fix, but deep tears need more.
- Surface scratches: minor abrasions that only affect the top color layer.
- Cracks: fissures in the finish that have not yet penetrated the base material.
- Tears: complete breaches in the upholstery that expose the underlying foam.
- Peeling: a failure of the topcoat, common in older or lower-quality synthetic leathers.
Decide Which Repairs You Can Complete at Home
Most cosmetic issues can be fixed with a basic leather seat repair kit. You can handle light scuffs, narrow cracks, and small holes with simple tools and patience.
Signs That the Foam, Backing, or Seat Structure Needs Professional Repair
Some damage goes deeper than the surface. If the seat cushion is distorted or the foam is crumbling, you might need a pro.
- The seat cushion is permanently distorted or collapsed.
- Large sections of foam are missing or crumbling.
- The stitching has detached along a major load-bearing seam.
- Tears are longer than three inches or located in high-stress areas.
Match the Repair Method to the Severity of the Damage
After identifying the problem, choose the right leather seat repair kit approach. Shallow damage needs a light touch, while deeper issues require a backing patch for stability.
Choosing the right method for the damage ensures a durable and good-looking fix. Proper assessment is key to a successful DIY project.
Choose the Right Car Leather Repair Kit and Supplies
Starting a repair with the right car leather repair kit is key. The right tools can make a big difference and help you fix your leather seat for good.
What a Complete Leather Seat Repair Kit Should Contain
A complete car leather repair kit has everything you need to fix cracks, tears, and scratches. Make sure it has all the essentials for the best results.
Leather Cleaner, Prep Solution, and Degreaser
First, clean the surface to remove dirt and oils. A cleaner and degreaser help the filler stick to the leather.
Color-Matched Leather Filler and Flexible Adhesive
For deep cracks and tears, use a flexible filler. It fills gaps and levels the surface, while the adhesive holds torn edges together.
Grain Paper, Applicators, Sponges, and Sandpaper
These tools help you match the original texture. Grain paper and sandpaper smooth out the area for a perfect finish.
Leather Dye, Colorant, and Protective Finish
The last step in any car leather repair kit job is to restore the color. A good colorant hides the repair, and a protective topcoat keeps it safe from damage.
When to Choose an Auto Leather Repair Kit for Vinyl or Synthetic Seats
If your car has vinyl or synthetic seats, choose a special auto leather repair kit. These kits are made for coated surfaces.
The secret to a perfect repair lies in matching the flexibility of your filler to the elasticity of the seat material itself.
Synthetic materials need special adhesives. Using the wrong products can cause poor adhesion or peeling.
Additional Supplies for a Leather Repair Kit for Car Seats
Even with a good kit, you might need extra items. These help keep your work area clean and safe.
Microfiber Cloths, Masking Tape, Gloves, and a Heat Tool
- Microfiber cloths clean without leaving lint.
- Masking tape protects trim from dye spills.
- Gloves keep your skin clean and prevent oils from getting in the way.
- A heat tool or hair dryer sets the filler and colorant fast.
How to Test Color and Product Compatibility
Always test a new product before using it on your seat. Check the manufacturer instructions to make sure it works with your upholstery.
Apply a small amount of colorant and filler to a hidden area. Wait for it to dry to see if the color and texture match.
Prepare Your Car Seats for a Durable Repair
Getting a professional look on your car seats starts before you open your car leather repair kit. It is important to prepare the surface well so that fillers and colorants stick to the material. Without this step, your repair might not last long.
Clean Dirt, Body Oil, and Residue From the Damaged Area
Leather absorbs oils, sweat, and dirt over time, and these can stop adhesives from sticking. Use a leather cleaner to clean the area well, removing all dirt first.
Protect the Dashboard, Trim, Carpet, and Undamaged Upholstery
Spills of dye or adhesive can damage your car interior. Use painter tape and plastic sheeting to cover the dashboard and carpet. This step helps you avoid cleaning up spills later.
Dry the Surface and Improve Ventilation
Moisture can ruin a strong bond. Make sure the leather is dry after cleaning, and work in a well-ventilated area to avoid inhaling fumes from your automotive leather repair kit.
Trim Loose Fibers and Remove Flaking Material
If your leather is peeling or cracked, you will see loose fibers. Use scissors or a razor blade to trim them away. A smooth edge helps the filler blend with the surface.
Lightly Sand Uneven Edges Without Enlarging the Damage
Gently sand the edges of the tear or crack with fine-grit sandpaper. This creates texture for the repair compound to grip. Focus only on the damaged area to avoid scratching other parts.
Safety Precautions for Cleaners, Adhesives, and Heat
Always wear gloves to protect your skin from harsh chemicals. Use a heat gun or hair dryer carefully to avoid burning the leather. Safety is paramount when working with chemicals.
| Preparation Step | Tool Required | Primary Goal |
|---|---|---|
| Deep cleaning | Leather cleaner | Remove oils and dirt |
| Masking | Painter tape | Protect trim and carpet |
| Surface smoothing | Fine-grit sandpaper | Improve adhesion |
| Ventilation | Open windows | Ensure user safety |
Fix Light Scratches, Scuffs, and Abrasions With a Car Leather Repair Kit
Fixing your car seats starts with small repairs, and a car leather repair kit is the cheapest place to begin. Scratches from keys or daily wear can be fixed with a car leather repair kit. Follow a simple method to get great results without replacing your seats.
Blend Shallow Scratches With Cleaner and Leather Conditioner
Light marks might just need a good clean and a conditioner. This will make the scratch blend in with the rest of the panel. Make sure the area is dry before applying conditioner to avoid moisture issues.
Fill Deeper Scratches With Flexible Leather Filler
For deeper scratches, you need a flexible filler. It fills the gap and makes the leather smooth again.
Apply Thin Layers Instead of One Thick Coat
When using a leather repair kit for car seats, be patient. Use thin layers of filler for better adhesion and a natural look, and let each layer dry before adding the next.
Recreate the Original Grain Before the Filler Fully Cures
While the filler is still tacky, use a grain pad to match the leather texture. This makes the repair almost invisible. Once cured, the texture stays.
Restore Color to Faded or Scuffed Leather
After smoothing the surface, fix any color loss. Use the colorant from your car leather repair kit to match the seat.
Test the Colorant in a Hidden Location
Test the colorant in a hidden spot first to make sure the color is right. Never skip this step, because correcting color mistakes is hard.
Build Coverage With Light, Even Applications
Apply the colorant in thin, even layers. This avoids streaks and gives a professional finish. Let each layer dry before adding more.
Seal the Repaired Area Against Friction and Moisture
After coloring, apply a protective topcoat. It keeps the repair safe from daily wear and moisture. A good sealant keeps your leather repair kit for car seats work looking great for years.
Check the Repair From Different Angles and in Natural Light
Check the repair in bright light from all angles. Look for any texture or edge issues and fix them while the sealant is still wet.
| Damage Type | Recommended Treatment | Expected Result |
|---|---|---|
| Surface scuff | Cleaner and conditioner | Invisible blend |
| Shallow scratch | Light filler and colorant | Smooth texture |
| Deep abrasion | Multi-layer filler and sealant | Restored integrity |
Repair Cracked, Dry, or Peeling Leather on Your Seats
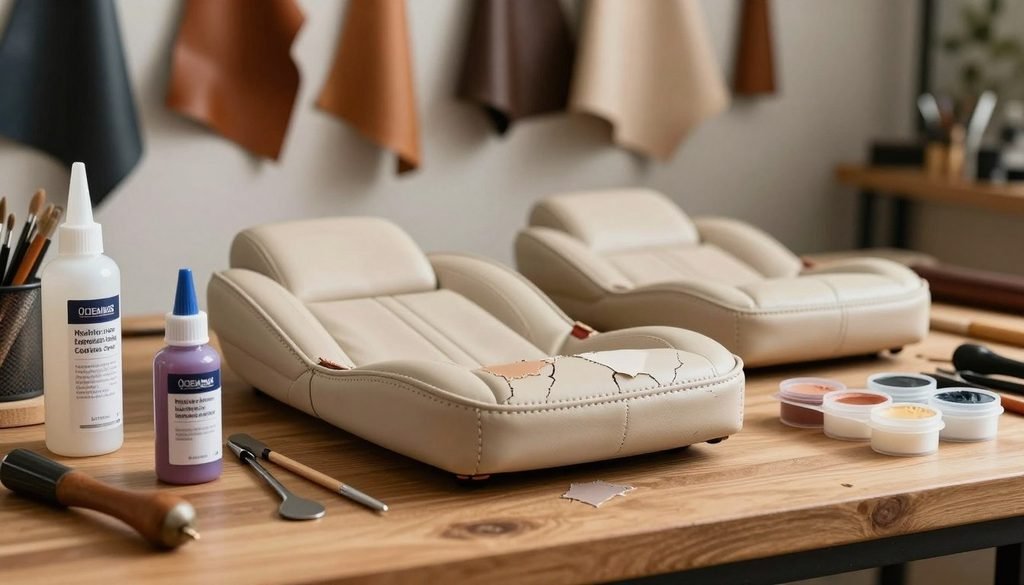
Fixing dry, cracked, or peeling leather in your car is easy with the right tools. A top-notch leather seat repair kit can make your seats look new again without a professional. Just follow a few steps to make sure your fix lasts and looks good.
Condition the Surrounding Leather Without Softening the Repair Area
First, take care of the healthy parts of your seat with a good leather conditioner. Be careful not to get it on the damaged spot, because too much oil can ruin the repair.
Prepare Cracks by Removing Flaking Coating and Loose Edges
Check the damage to see how deep it goes. Use sandpaper to smooth out loose edges. This makes the area ready for the filler and ensures a long-lasting finish.
Press Flexible Filler Into Narrow and Wide Cracks
After prepping, use a spatula from your leather seat repair kit to fill the cracks. Make sure the filler is level with the rest of the seat. For big gaps, apply it in thin layers.
Use a Grain Pad to Match the Existing Seat Texture
Press a grain pad onto the wet filler to match the seat texture. This step makes the repair look like the original leather. Consistency is key for a natural look.
Allow Each Layer to Cure Before Adding More Material
Be patient during the drying time. Let each layer dry fully before adding more, because hurrying can cause unevenness or new cracks.
Repair Peeling Color Coats With Adhesive and Colorant
If the color coat is peeling, start by fixing the edges with leather adhesive. Then apply colorant in thin layers. This keeps the seat looking even and flexible.
Blend the Repaired Section Into the Rest of the Seat
After the colorant dries, blend the repair edges into the rest of the seat. Use a soft cloth or sponge to smooth out the color and make the repair almost invisible.
Prevent New Cracks With Proper Cleaning, Conditioning, and Sun Protection
To keep your seats looking great, follow a regular care routine:
- Clean your seats monthly to remove oils and dirt.
- Apply a UV-protectant conditioner to prevent drying and fading.
- Use sunshades when parked to protect from heat and UV rays.
- Avoid sliding across the seat to reduce wear.
By using your leather seat repair kit for small fixes and keeping up with care, your interior will stay showroom-ready for years.
Repair Tears, Cuts, and Small Holes in Leather Upholstery
You can fix unsightly tears and small holes in your leather upholstery using a specialized car leather repair kit for automotive upholstery. These kits have everything you need to close gaps and make your seats strong again. If the area around the tear is stable, you can do it yourself.
Inspect the Tear and Stabilize the Edges
First, look closely at the damage to see how big it is. Use sharp scissors to cut off any frayed threads or loose leather. Clean edges help the repair material stick well to the seat.
Place a Backing Patch Beneath the Damaged Leather
A backing patch is the base of your repair. You need to slide this fabric or mesh through the tear to support the filler.
Center the Patch Without Stretching the Seat Cover
Slide the patch into the tear and flatten it under the leather. Avoid pulling or stretching the seat cover, because too much force can make the repair fail or leave a depression.
Use Flexible Adhesive Designed for Automotive Upholstery
Put a thin layer of flexible adhesive on the leather edges and press the leather onto the patch to bond it well. Use an auto leather repair kit adhesive so the repair moves with the seat without cracking.
Close the Tear and Fill the Remaining Gap
Once the patch is in place, use a flexible leather filler to fill the gap. Apply the filler in thin layers, letting each dry before adding more. This stops the filler from shrinking or sinking as it dries.
Rebuild the Surface Texture Over the Patch
Leather has a unique grain pattern that you should match for a professional look. While the final layer of filler is still soft, use a grain pad or textured tool to press the pattern into the surface. This step is crucial for blending the repair with the surrounding upholstery.
Apply Colorant to Conceal the Repair
After the filler hardens, apply a matching colorant to the area. A good auto leather repair kit will have pigments you can mix for the perfect shade. Dab the color on gently with a sponge for an even finish that matches the seat.
Know When a Large Tear Requires Professional Upholstery Work
Not every tear can be fixed at home. Large tears, damaged seams, or exposed foam mean the seat structure is at risk. In these cases, it is best to get help from an automotive upholstery professional for a safe and lasting fix.
Recolor, Seal, and Finish the Repaired Area
After fixing the damage, you need to make your car seats look new again. This last step makes your car leather repair kit work look factory-finished. It takes patience and care to get the color and seal right.
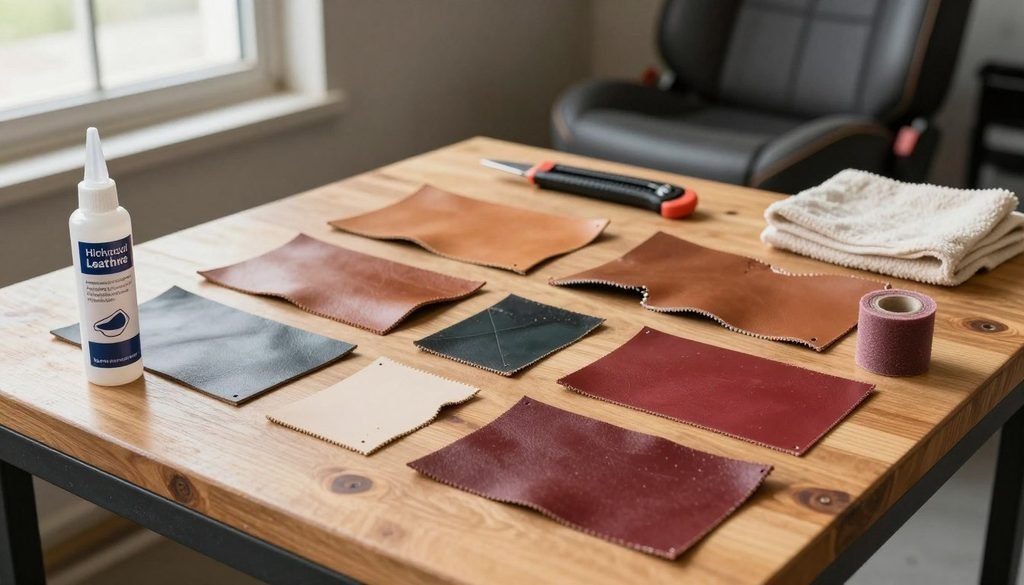
Match the Original Seat Color and Sheen
Before you start coloring, make sure the match is perfect. Test the color on a small, hidden area first, and always check the sheen in sunlight to match the rest of the interior.
Apply Automotive Leather Colorant in Controlled Layers
When using an automotive leather repair kit, apply color in thin layers. A sponge or airbrush helps control the coverage. Let each layer dry before adding more to avoid streaks.
Blend Into the Surrounding Panel Rather Than Stopping at a Hard Edge
To hide the repair, blend the color outward. Dab the edges gently so the color fades into the leather. This creates a smooth transition that hides the repair.
Use Heat Carefully to Set the Colorant
After applying color, use a hair dryer on low heat to speed up drying. Move the dryer constantly to avoid scorching the leather. Proper heat helps the color bond well.
Apply a Flexible Protective Topcoat
A good topcoat protects your repair from daily wear. Apply it in thin, even coats for a durable barrier, and choose a finish that matches the original shine of your seats.
| Finish Type | Best For | Maintenance Level |
|---|---|---|
| Matte | Modern luxury vehicles | Low |
| Satin | Standard factory seats | Medium |
| Gloss | Vintage or custom interiors | High |
Allow the Seat to Cure Before Driving
Be patient for a lasting result. The surface may feel dry quickly, but it needs time to fully set. Avoid sitting on the seat for at least 24 hours for maximum durability.
Condition the Finished Surface Without Making It Slippery
After curing, apply a light leather conditioner to keep it soft. Use a microfiber cloth to buff and remove excess product. This keeps the leather supple and prevents cracking without making it slippery.
Maintain the Repair and Troubleshoot Common Problems
Even with the best leather seat repair kit, you might face minor issues after the job. Getting a professional-grade finish takes patience and attention to detail during curing. Knowing how to handle these common problems keeps your interior looking great for years.
Fix Sticky, Uneven, or Glossy Results
If your repair feels sticky or looks too shiny, you probably used too much product. Too much material stops it from curing properly and leaves a tacky mess. To fix this, gently buff the area with a soft cloth or apply a matte finisher to reduce shine.
Correct Color Mismatch, Visible Edges, and Texture Differences
Visible edges or color mismatches often come from poor blending or the wrong shade. To fix them, sand the edges lightly and apply a thin layer of colorant. For flat texture, use a textured sponge or leather grain paper on the filler before it sets.
Handle Repairs That Crack or Peel Again
Cracks that come back mean the leather is still too dry or the filler is not flexible enough. If it peels, remove the loose parts and prep the surface with a good degreaser. Use a flexible filler made for car seats so it follows the movement of the seat.
Clean and Protect Repaired Leather During Regular Use
Keeping your leather repair kit for car seats work intact means regular care. Clean with a pH-balanced leather cleaner to avoid damage, and apply a leather conditioner every few months to keep the leather soft and prevent new cracks.
- Avoid harsh chemicals: stick to cleaners made for automotive leather.
- Limit sun exposure: use shades to protect your seats from UV rays.
- Regular inspection: check the repair area monthly for wear or fading.
Know When to Stop Repairing and Contact an Automotive Upholstery Professional
DIY fixes work for small damage, but some problems need a pro. Call a professional if you see:
| Damage Type | Severity | Recommended Action |
|---|---|---|
| Large, deep tears | High | Professional stitching |
| Structural foam collapse | High | Upholstery replacement |
| Extensive, widespread cracking | High | Full panel reupholstery |
Trying to fix major damage or long tears with a leather repair kit for car seats will not last. For serious damage, a pro can give a lasting fix that keeps your car safe and looking good.
Conclusion
Fixing your car interior with a car leather repair kit starts with knowing what material it is made of. Whether it is a small scratch or a big tear, picking the right repair kit is key. Clean and prepare the area well to help the fix stick.
Getting a professional-looking finish takes time and care. Apply thin layers of colorant and wait for each one to dry properly. This avoids problems like flaking or unevenness. A good car leather repair kit helps you match the repair to your interior, as long as you follow the instructions.
Keeping your seats in top shape is important. Clean and condition them regularly to stop cracks. If damage goes deep, get help from a leather repair specialist. By doing this, your car interior will stay comfortable and good-looking for a long time.
FAQ
How do I determine if a leather seat repair kit is right for the damage in my vehicle?
First, check the severity and location of the damage. If you have small cracks, scratches, or tears, a repair kit is a good DIY fix. But if foam is exposed or the seat structure is damaged, you need a professional.
Can I use the same auto leather repair kit for both genuine leather and vinyl upholstery?
It is important to identify your material first. Some kits are made for natural hides, while others are made for synthetic surfaces. Even though many kits are versatile, vinyl needs a special adhesive and colorant. Always check the kit instructions for your material.
What essential components should be included in a complete automotive leather repair kit?
A good kit should have a leather cleaner, a flexible filler, a strong adhesive, and grain papers. It should also include color-matched dyes and a protective finish to seal the repair.
How do I ensure the color from my leather repair kit for car seats matches my interior?
To match the color, test it in a hidden area first. Apply the color in thin layers and blend it into the surrounding panel. This technique helps hide the repair edges.
Why is it necessary to use a backing patch for tears and holes?
A backing patch is needed for deep tears because it provides support for the filler. Use a flexible adhesive to secure the patch so the seat does not stretch or reopen.
How long should I wait before sitting on the seat after using a leather seat repair kit?
Wait at least 24 to 48 hours before using the seat again. This allows the adhesives and colorants to fully bond. Avoid driving during this time if possible.
What should I do if the repaired area feels sticky or looks too glossy?
Stickiness usually means the colorant was applied too thickly. If it is too glossy, use a matte finisher. If it is still tacky, clean it with a prep solution and reapply a thinner topcoat.
How can I maintain the repair and prevent new cracks from forming?
After the repair cures, clean it regularly with a pH-neutral cleaner and use a quality leather conditioner. To prevent damage, use a sunshade and avoid sliding across the bolsters.